

Quick Summary
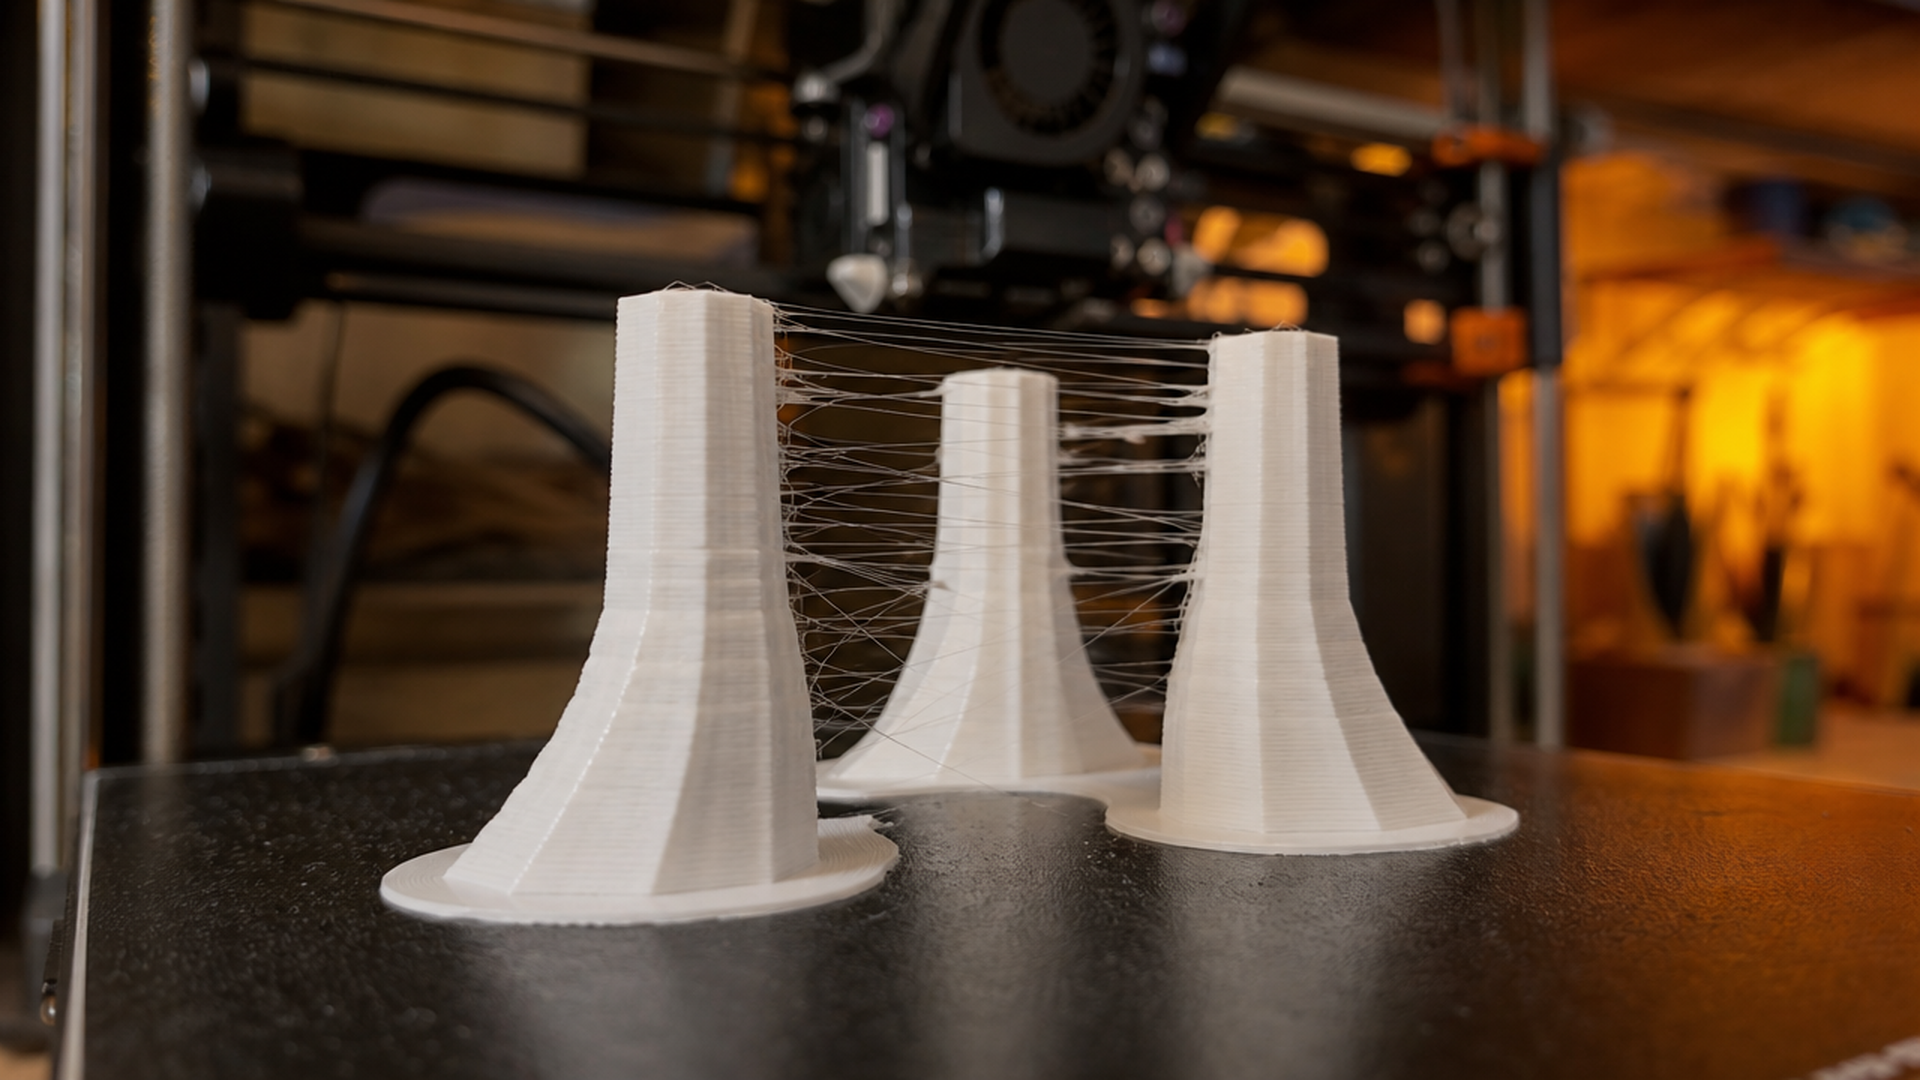
- 3D printer stringing is caused by molten filament oozing from the nozzle during travel moves, most often from insufficient retraction, excessive print temperature, or slow travel speed.
- Enabling retraction and tuning retraction distance (1-7mm for Bowden, 0.5-2mm for direct drive) eliminates stringing in the majority of cases.
- PLA prints best at 195-210°C for low stringing; PETG requires 230-245°C but needs higher retraction speed to compensate for its stringy nature.
- Combing mode in OrcaSlicer, Bambu Studio, PrusaSlicer, and Cura keeps the nozzle traveling inside the print perimeter, reducing the number of travel moves that cross open air.
- Existing strings on finished prints can be removed with a heat gun set to 60-80°C passed 3-5cm above the surface for 2-3 seconds per area.
3D printer stringing occurs when molten filament leaks from the nozzle during travel moves between separate print regions, leaving thin plastic threads across the model. Fixing stringing requires adjusting retraction settings, lowering print temperature to the material’s lower end, increasing travel speed above 150mm/s, and enabling combing mode so the nozzle avoids open air crossings. Most cases resolve within two to three targeted slicer changes.
📋 In This Guide
- What Causes 3D Printer Stringing?
- Retraction Settings: The #1 Fix for Stringing
- Temperature Optimization for Each Filament
- Travel Speed, Combing, and Z-Hop Settings
- Cooling and Fan Control for String-Free Prints
- Post-Processing: How to Remove Stringing from Finished Prints
- Advanced Troubleshooting: When Stringing Persists
- Common Questions About 3D Printer Stringing
- Fix Stringing and Print Cleaner Models
What Causes 3D Printer Stringing?
Stringing happens when thermoplastic remains liquid enough to flow out of the nozzle between print moves. Three root causes drive nearly every case: the nozzle fails to retract filament before travel, the melt temperature is too high for the material’s viscosity, or the travel speed is slow enough that the nozzle dribbles as it crosses open air.
The Role of Retraction in Stringing
Retraction pulls molten filament back into the nozzle before a travel move begins. Without it, the pressure inside the hot end stays positive, pushing plastic out continuously. Retraction distance determines how far back the filament moves (measured in mm); retraction speed determines how fast that pullback happens.
Bowden tube setups (where the extruder motor sits away from the hot end) need more retraction distance to overcome the tube gap: typically 3-7mm at 40-60mm/s. Direct drive extruders sit directly above the hot end and only need 0.5-2mm at 25-45mm/s. Going beyond these ranges causes under-extrusion at the start of the next segment without meaningfully reducing stringing.
Temperature and Viscosity: Why Heat Matters
Higher temperature makes filament runnier. A PLA print at 220°C strings significantly more than the same model at 200°C because the lower viscosity lets plastic escape between retraction and travel. Each 5°C reduction typically reduces stringing noticeably, especially with PLA and PETG. Drop temperature in 5°C increments and run a stringing test tower between changes to find the lowest stable printing temperature without losing layer adhesion.
Travel Moves and Oozing: The Speed Factor
The nozzle oozes proportionally to the time it spends traveling over open air. A travel speed of 80mm/s gives the melt three times as long to drip compared to 240mm/s over the same distance. Faster travel also keeps the nozzle movement more abrupt, which helps snap any thin thread rather than dragging it.
📊 Market context: According to All3DP (2025), enabling and correctly tuning retraction is the single most effective anti-stringing measure across all FDM materials. It is the first setting to check on any printer exhibiting ooze or whisker artifacts.
Retraction Settings: The #1 Fix for Stringing
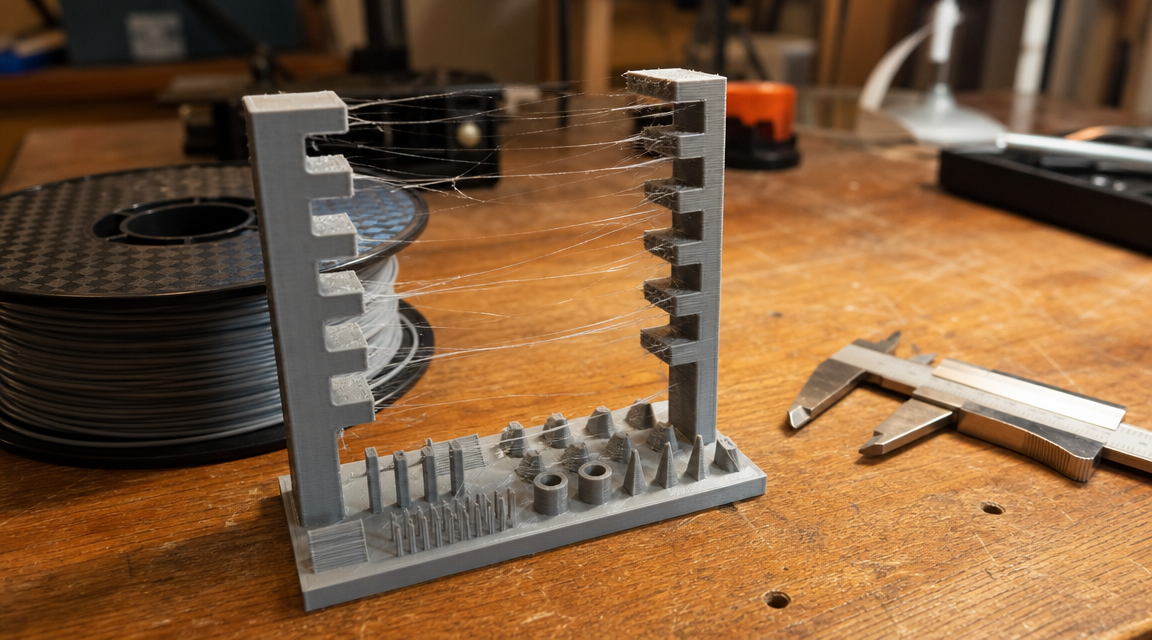
Retraction is the first adjustment to make when a print strings. Get this right before touching temperature or travel speed. A retraction tower (a test model with different retraction distances on each floor) is the fastest way to dial in values without guessing.
Retraction Distance and Speed by Filament Type (PLA, PETG, TPU)
Each material has a different viscosity profile, which changes how much retraction it needs:
| Material | Drive Type | Retraction Distance | Retraction Speed | Notes |
|---|---|---|---|---|
| PLA | Direct drive | 0.5 – 1.5mm | 25 – 45mm/s | Lower end for silk PLA |
| PLA | Bowden | 4 – 6mm | 40 – 60mm/s | Start at 5mm |
| PETG | Direct drive | 1 – 2mm | 25 – 40mm/s | PETG strings more than PLA at equal temps |
| PETG | Bowden | 4 – 7mm | 35 – 50mm/s | Avoid exceeding 7mm or filament strips |
| TPU | Direct drive only | 0 – 1mm | 20 – 30mm/s | TPU is flexible; high retraction jams the extruder |
| ABS / ASA | Direct drive | 1 – 2mm | 30 – 45mm/s | Use enclosure; cooling speed also affects stringing |
⚠️ TPU warning: TPU is flexible and elastic. High retraction distances cause the filament to coil inside the extruder instead of retracting cleanly. Keep retraction at 1mm or below on direct drive. On Bowden setups, TPU is extremely difficult to print reliably due to the tube gap; use direct drive for best results.
Slicer-Specific Retraction Tuning: Cura, PrusaSlicer, OrcaSlicer, Bambu Studio
Each slicer exposes retraction settings through slightly different menus:
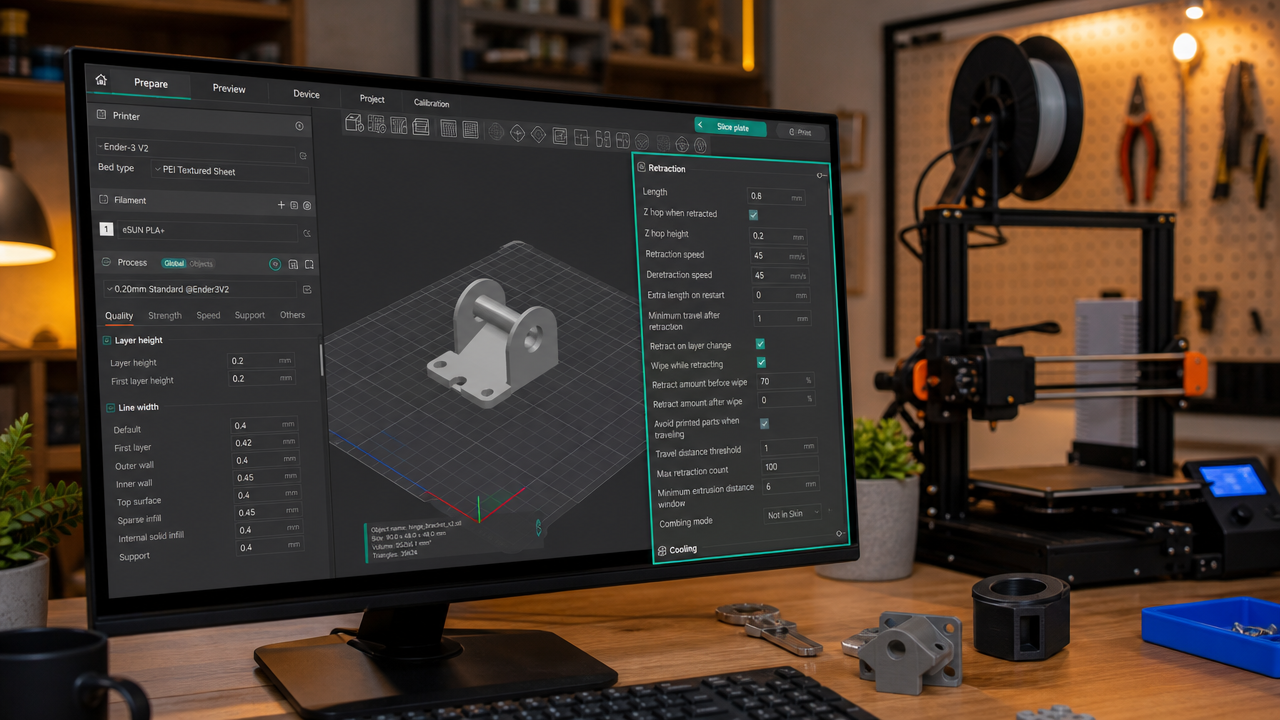
OrcaSlicer: Go to Filament Settings > Retraction. Enable “Retraction when changing layer” separately from normal retraction. OrcaSlicer’s “Wipe while retracting” feature drags the nozzle sideways over existing plastic while retracting, which reduces the stringing from the retract move itself. Set wipe distance to 1-2mm.
Bambu Studio: Retraction lives in Filament Settings > Advanced. For Bambu Lab AMS multi-material setups, retraction behaves differently during filament changes vs. mid-print retracts. The “retract amount before wipe” option controls how much material is pulled back before the wipe sequence. Default system profiles for X1C and P1S are well-tuned; adjust only if printing non-Bambu filament brands.
PrusaSlicer: Printer Settings > Extruder 1 > Retraction. Enable “Retract on layer change” to catch the extra ooze that happens as the nozzle lifts between layers. “Retract before travel” sets the minimum travel distance that triggers a retract (set to 1mm to retract on all meaningful moves).
Cura: Search “retraction” in the settings panel. Enable “Retraction Extra Prime Amount” (0.2-0.5mm³) to compensate for pressure lost during travel on materials that depressurize slowly (PETG, flex). Also enable “Retract Before Outer Wall” to avoid blobs where the nozzle starts the perimeter.
Fixed Your Stringing? Now Print Something Worthy of It.
Browse thousands of free, print-ready 3MF models from the DIY3D community. No paywalls, no brand lock-in.
Open to all printers. 100% free. No account required to browse.
Temperature Optimization for Each Filament
Print temperature has a direct relationship with stringing severity. Lowering it reduces melt fluidity, which means less plastic can escape during a travel move even when retraction is not perfectly tuned. The goal is the lowest temperature where layers still fuse properly and you see no under-extrusion.
PLA: Finding the Sweet Spot Below 210°C
Most PLA brands print reliably between 195-215°C. Stringing increases sharply above 215°C. Start at 210°C and run a temperature tower dropping 5°C every 5mm of height (most slicers include a temperature tower model or script). For standard PLA on a direct drive printer, 200-205°C typically gives the best surface finish with minimal stringing.
Silk PLA is the exception: it needs 215-225°C for proper layer fusion, so it inherently strings more than standard PLA. Compensate with lower retraction distance (0.5-1mm) and higher travel speed rather than pushing temperature down below 215°C.
PETG: Balancing Flow and Ooze Between 230-250°C
PETG is the most prone-to-stringing common filament. Its adhesive nature and relatively low viscosity at print temperature make it cling to everything. Print temperature range is typically 230-250°C; aim for 235-240°C as a stringing-optimized starting point. PETG also benefits from a 0.5-1mm Z-hop during travel to physically separate the nozzle from sticky deposits on the print surface.
Do not push PETG below 230°C trying to fix stringing. Under that threshold, layer adhesion degrades and you will get delamination on taller prints. The correct fix for PETG stringing is higher retraction speed combined with combing mode, not lower temperature.
TPU: Slow and Cool to Minimize Stringing
TPU flexible filament prints at 220-240°C depending on the Shore hardness. Softer grades (95A and below) string more due to higher elasticity allowing partial decompression of the melt. Print speed matters as much as temperature for TPU: keep print speed at 25-40mm/s and travel speed at 150-200mm/s. Higher overall print speeds cause pressure build-up in the nozzle that increases oozing between moves.
Travel Speed, Combing, and Z-Hop Settings
After retraction and temperature, travel behavior is the next lever. These three settings work together to minimize how much open-air crossing the nozzle does and how quickly it crosses when it must.
Increasing Travel Speed to Reduce Ooze Time
Travel speed is separate from print speed. On modern printers, travel at 150-300mm/s is standard. If your travel speed is set at 80-100mm/s (a common default on older profiles), doubling it to 200mm/s reduces ooze dwell time by half. In Bambu Studio and OrcaSlicer, travel speed is in Print Settings > Speed. In Cura, it is under Speed > Travel Speed. In PrusaSlicer, it is Printer Settings > Machine limits > Travel.
Combing Mode: Keeping Nozzle Inside the Print
Combing mode reroutes travel paths so the nozzle stays inside the printed perimeter whenever possible instead of crossing open air. When the nozzle travels through already-deposited plastic, a thin string never forms because there is no air gap for it to span.
In Cura, enable “Combing Mode” and set it to “Within Infill” for most models, or “All” for models with complex internal geometry. In OrcaSlicer and PrusaSlicer, this is “Avoid crossing perimeters” under Print Settings > Travel. In Bambu Studio, it is “Avoid crossing wall” in the print profile.
Combing slightly increases total travel distance and therefore print time, but the reduction in post-processing work is worth the trade-off on complex models.
Z-Hop: When to Use It and When to Avoid It
Z-hop lifts the nozzle a small distance (0.1-0.4mm) before each travel move. This prevents the nozzle dragging across the print and knocking over tall, thin features. However, it adds extra vertical move time during which the nozzle is still hot and can drip. Z-hop is worth enabling for PETG and flexible materials where nozzle drag is a bigger problem than thin-air stringing. For PLA printing, disable Z-hop and rely on combing and retraction instead.
Cooling and Fan Control for String-Free Prints
Cooling solidifies extruded plastic quickly after deposition. Faster cooling means the melt stops flowing sooner, which reduces the window during which a string can form. Cooling fan speed is material-dependent because some materials crack with aggressive cooling.
Part Cooling Fan Speed by Material
PLA: 100% fan speed after the first 3 layers. PLA benefits from maximum cooling because fast solidification improves both surface quality and stringing resistance. PETG: 30-50% fan speed maximum. PETG does not like rapid cooling and will delaminate between layers if fan speed is too high. ABS/ASA: 0-20% fan or fan off entirely. Enclosure is required. TPU: 50-80% fan speed. Flexible materials benefit from moderate cooling to stop drips without brittlizing the material.
Minimum Layer Time and Its Impact on Stringing
Minimum layer time (also called minimum layer cool-down time) pauses or slows the printer when a layer takes less than the set threshold (typically 5-15 seconds). This prevents the next layer from being deposited on still-liquid plastic. Extremely short layers are common on small or pointed features. Without minimum layer time, these areas look stringy and blobby because the nozzle sits almost stationary above a molten pool. Set minimum layer time to 8-12 seconds for small parts, and 5-8 seconds for larger models.
Post-Processing: How to Remove Stringing from Finished Prints
Even with perfect settings, some filaments (PETG, silk PLA, flexible TPU) produce occasional fine strings. Post-processing removes them quickly without damaging the print geometry.
Heat Gun and Tweezers Method
A heat gun set to 60-80°C passed 3-5cm above the surface for 2-3 seconds per area melts thin strings without softening the main walls. The strings shrink and retract into the surface or drop off. Work in sections rather than holding the heat gun in one place. For PLA, 60°C is sufficient; PETG needs 70-80°C. Do not use a heat gun on TPU prints as it deforms the flexible material permanently.
Sanding and Trimming Thin Strings
A pair of fine tweezers or a dental pick removes individual strings cleanly on detailed models where a heat gun might blur features. For flat surfaces with light stringing, 400-grit sandpaper removes thin plastic threads without scratching. Work along the print surface direction rather than across it. This approach is best for miniatures, figurines, and architectural models where heat near fine details is risky.
Chemical Smoothing for ABS and ASA
ABS and ASA dissolve in acetone vapor. An acetone smoothing chamber (a sealed container with acetone-soaked paper towels, model suspended above the liquid for 15-30 minutes) removes layer lines and stringing simultaneously. The acetone vapor reflows the surface just enough to fuse the strings back into the model. This does not work on PLA, PETG, or TPU, which are not soluble in acetone.
Advanced Troubleshooting: When Stringing Persists
You have tuned retraction, lowered temperature, cranked travel speed, and enabled combing mode, but strings are still showing up. These three hardware and material factors are the next tier to check.
Checking for Nozzle Wear and Partial Clogs
A partially clogged nozzle creates inconsistent pressure inside the hot end. During normal printing, the blockage restricts flow; during travel, the residual back-pressure forces material through the restriction, creating drips and strings unpredictably. Cold pull the nozzle (heat to 250°C, push filament through, cool to 90°C, then pull out sharply) to remove accumulated debris. If stringing improves immediately after a cold pull, a dirty nozzle was the root cause. Brass nozzles wear out noticeably after 500-1,000 hours of abrasive filament use (carbon fiber, glow-in-the-dark, wood fill); replace with a hardened steel nozzle if running abrasive materials regularly.
Filament Moisture: Drying Your Spool
Wet filament strings aggressively. Hygroscopic materials (PETG, nylon, TPU, PVA) absorb atmospheric moisture within hours of being left open. Moisture in the filament turns to steam in the hot end, expanding and forcing extra material out during travel. Signs of wet filament: popping or crackling sounds during printing, bubbly surface texture, and strings appearing even with correct retraction settings.
Dry filament in a food dehydrator or dedicated filament dryer at the material’s recommended temperature: PLA at 45-50°C for 4-6 hours, PETG at 65-70°C for 6-8 hours, TPU at 45-55°C for 4-6 hours. A print from a properly dried spool typically eliminates moisture-related stringing immediately.
Bowden vs. Direct Drive: Adjusting Retraction for Your Setup
If you have recently switched from a Bowden setup to a direct drive extruder (or vice versa), your retraction settings need a complete reset. Applying Bowden retraction values (5-6mm) on a direct drive extruder causes grinding and under-extrusion. Applying direct drive values (1mm) on a Bowden printer causes heavy stringing. Always reset to the recommended starting points in the retraction table above when changing extruder type, and run a retraction test tower before printing the actual model.
💡 DIY3D workflow tip: Once you have dialed in your stringing settings, download 3MF files from free 3D models on DIY3D that already have embedded print profiles. These pre-configured settings include tuned retraction and temperature values from community printers, so you spend less time dialing in every new model from scratch.
Common Questions About 3D Printer Stringing
How do I stop my 3D printer from stringing?
Stopping 3D printer stringing requires three coordinated changes: enable and tune retraction (1-6mm distance depending on extruder type), lower print temperature by 5-10°C toward the material’s minimum, and increase travel speed to 150-250mm/s. Enable combing mode in your slicer to reroute travel paths through infill rather than open air. These four changes address over 90% of stringing cases without requiring hardware modification.
Why is my 3D printer suddenly stringy?
Sudden stringing after previously clean prints usually points to one of three causes: the filament has absorbed moisture from the air (especially PETG, nylon, or TPU left open for days), the nozzle has a partial clog creating irregular back-pressure, or the print temperature setting was accidentally increased. Check your filament first by listening for popping sounds or watching for bubbly surface texture. Dry the spool at the appropriate temperature and run a test print before adjusting slicer settings.
Is stringing caused by too much heat?
Yes, excessive print temperature is one of the primary causes of stringing. Higher temperature reduces filament viscosity, making it flow more freely and escape the nozzle during travel moves. For PLA, printing above 215°C typically increases stringing significantly. Reducing temperature in 5°C increments and running a stringing test after each change is the fastest way to find the optimal temperature for a given filament brand and setup. Temperature alone rarely eliminates all stringing; it works best combined with proper retraction tuning.
How to get stringing off 3D print?
The fastest method for removing existing strings from a finished print is a heat gun at 60-80°C, passed 3-5cm above the surface for 2-3 seconds per area. The thin plastic threads shrink and retract without distorting the main geometry. For delicate models like miniatures or figurines, use fine tweezers or a dental pick to pull strings manually. Sanding with 400-grit sandpaper works on flat surfaces. Never use a heat gun on TPU or flexible prints as it permanently deforms the material.
Fix Stringing and Print Cleaner Models
Most 3D printer stringing cases resolve with targeted retraction tuning, a temperature drop toward the material’s lower limit, and enabling combing mode so the nozzle avoids open-air travel. When standard fixes do not work, check for wet filament and nozzle wear before assuming the problem is slicer settings. Persistent stringing after drying the spool and cleaning the nozzle almost always traces back to retraction values that need a full reset based on extruder type.
Once your settings are dialed in, use print-ready 3MF files with embedded profiles from the community to reduce how much tuning each new model requires. The DIY3D library includes models across every category from functional parts to miniatures, all free and open to every printer brand.
String-Free Prints Deserve Better Models
Discover free, print-ready 3MF files with embedded slicer settings from the DIY3D community. Works with every printer, every brand.
No account required to browse. No paywalls. Open to all printer brands.
