
Quick Summary
- 3D print bed adhesion is the single most critical factor for print success, and fixing it starts with a clean, level bed surface at the right temperature for your filament.
- PEI sheets deliver the best all-around adhesion for PLA and PETG, while glass beds and textured plates each excel with specific materials when properly prepared.
- A dirty bed surface causes an estimated 70% of first-layer adhesion failures, making isopropyl alcohol cleaning between every print the single most impactful habit you can adopt.
- Bed temperature matters as much as surface choice, with PLA sticking best at 50–65°C and ABS requiring 90–110°C inside an enclosure to prevent warping and lift-off.
3D print bed adhesion is the force that keeps your first layer bonded to the build surface throughout a print. Without reliable adhesion, the first layer curls, lifts, or detaches entirely, ruining the part hours into a job. Every major bed surface, adhesion method, and temperature setting affects how well that first layer sticks, and all of them are within your control.
- What Is 3D Print Bed Adhesion and Why It’s the Key to Success
- Best Bed Surfaces for Reliable 3D Print Bed Adhesion
- Proven Bed Adhesion Methods Every Maker Should Know
- Optimal Bed Temperatures for Every Filament Type
- How to Troubleshoot 3D Print Bed Adhesion Problems
- Common Questions About 3D Print Bed Adhesion
- Conclusion: Get Better Adhesion and Start Printing on DIY3D
What Is 3D Print Bed Adhesion and Why It’s the Key to Success
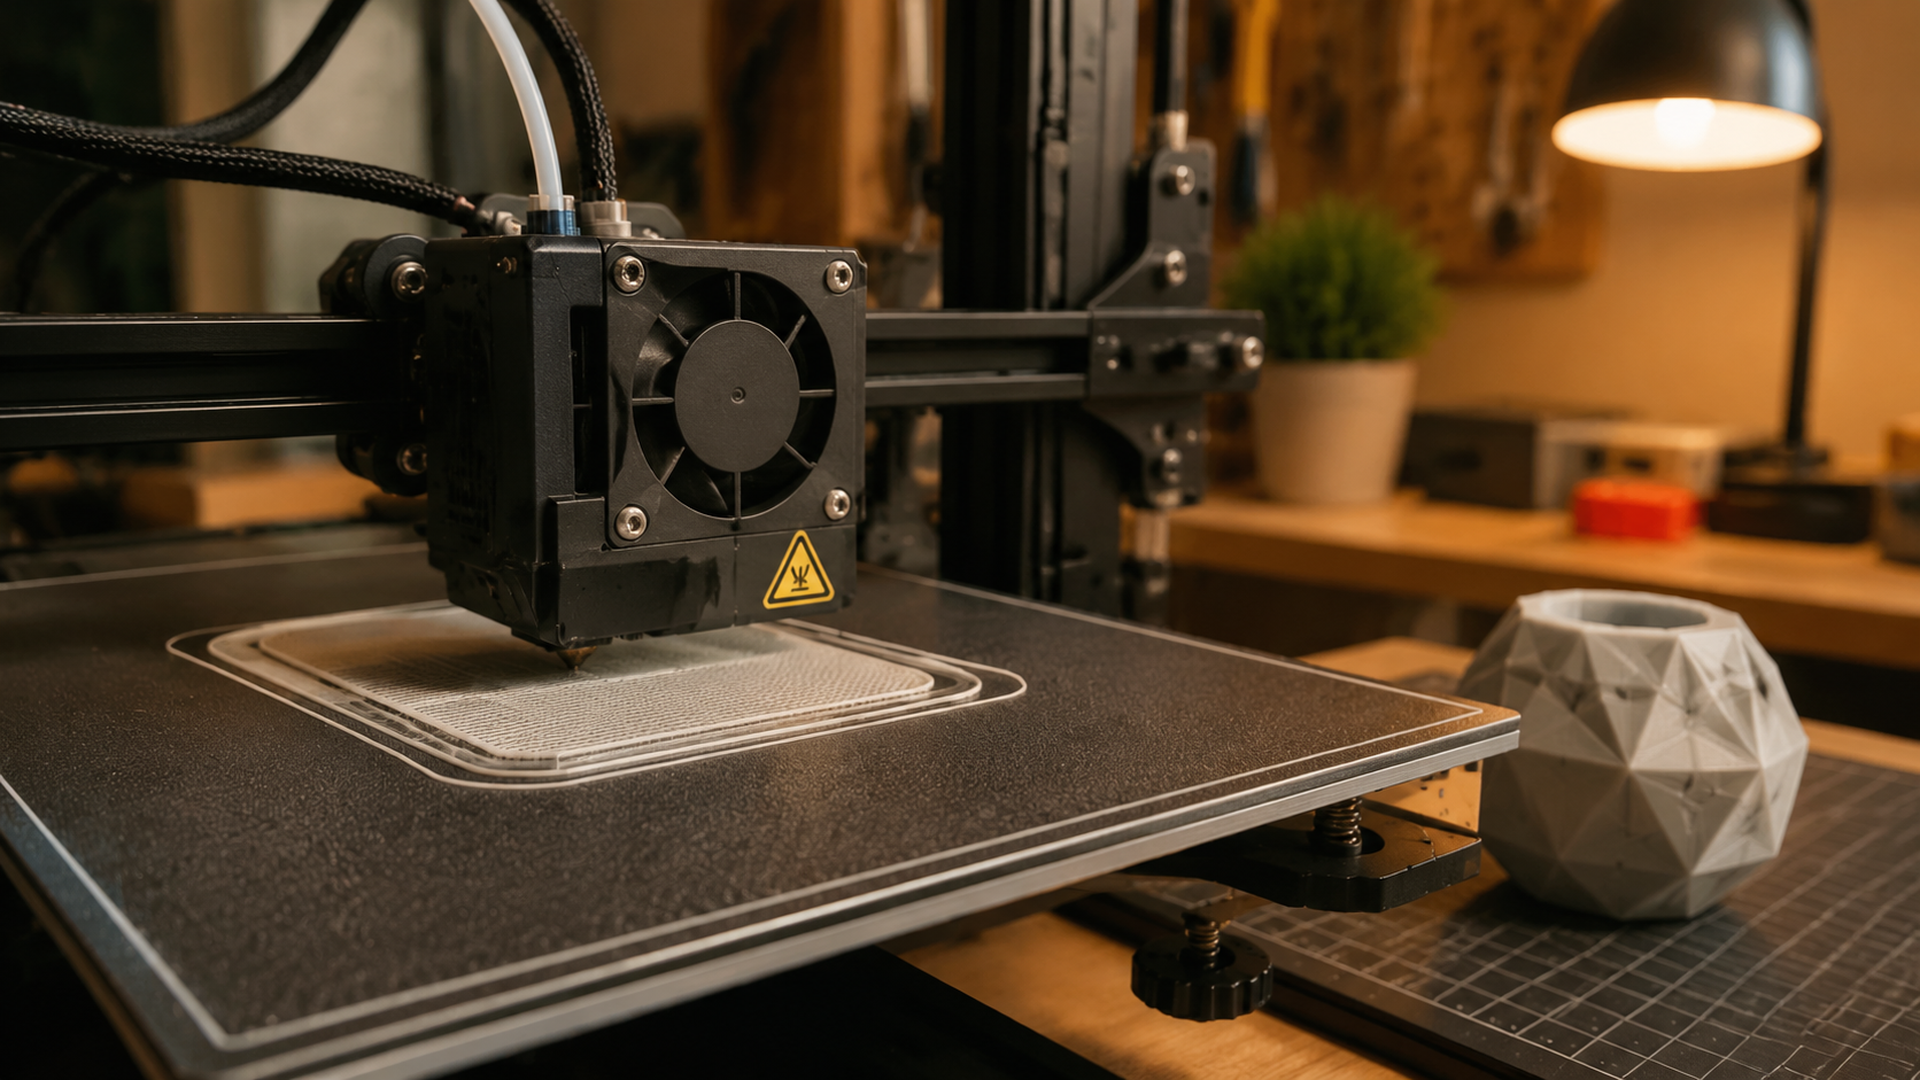
3D print bed adhesion refers to how well the molten thermoplastic bonds to the build surface as it exits the nozzle and cools. During the first layer, the filament is laid down at a specific Z-height that slightly squishes the round filament cross-section into a flat ribbon. This squish creates mechanical interlocking between the plastic and the microscopic texture of the bed surface.
If the adhesion is too weak, the edges of the print curl upward (warping) or the entire part detaches mid-print. If the adhesion is too strong, removing the finished print can damage the bed surface or require excessive force. The goal is a balanced bond that holds the part securely during printing but releases cleanly once the bed cools.
The first layer is the foundation of everything that follows. A failed first layer means a failed print, often hours into a job. Setting up proper bed adhesion before hitting print saves material, time, and frustration.
∼70% of first-layer adhesion failures trace back to a dirty or improperly prepared bed surface, according to community surveys across r/3Dprinting and major printing forums. A simple wipedown with isopropyl alcohol between every print eliminates the vast majority of these failures at zero cost.
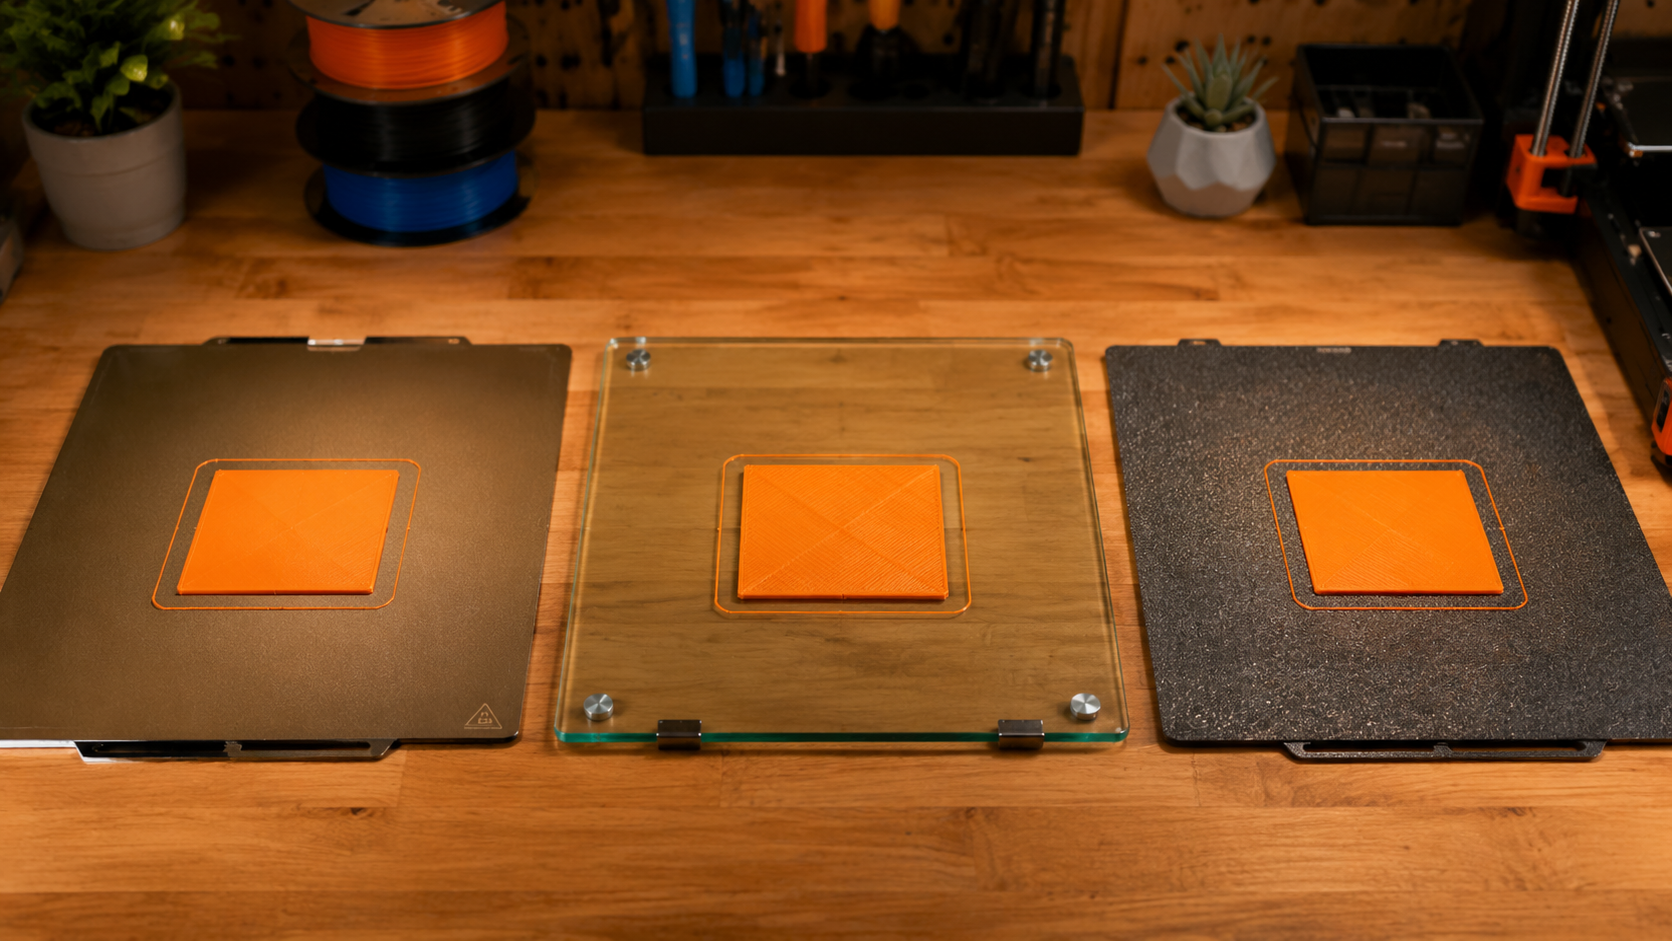
Best Bed Surfaces for Reliable 3D Print Bed Adhesion
Your choice of bed surface is the single most impactful hardware decision for adhesion. Different materials bond differently to each surface type, and switching surfaces is often cheaper and easier than fighting with a poorly matched combination.
PEI Sheets – The All-Rounder Champion
PEI (polyetherimide) sheets, branded as Prusa-style spring steel plates or Bambu Lab textured/smooth plates, offer the best balance of adhesion and release across the widest range of materials. PLA sticks firmly at 55°C and releases on its own once the bed cools below 40°C. PETG requires a glue stick release agent on smooth PEI to prevent over-bonding.
PEI is durable, flexible (the spring steel base lets you pop prints off by flexing), and resists damage from repeated use. The textured side reduces visible surface finish on the bottom of the print but improves grip for materials like PETG and TPU.
Pro tip: Never clean smooth PEI with acetone. It can degrade the PEI film over time. Use isopropyl alcohol only.
Glass Beds – Smooth Finish, Temperature Dependent
Glass beds produce a mirror-smooth bottom surface on prints, which is desirable for parts where the bottom face is visible. However, glass requires a higher first-layer bed temperature because glass is a poor thermal conductor compared to PEI or spring steel. PLA needs 60–65°C on glass versus 50–55°C on PEI.
Most glass beds come with a textured coating (borosilicate glass with a micro-etched surface) that improves grip. Without this coating, bare glass requires glue stick or hairspray to achieve reliable adhesion. Glass also adds thermal mass, meaning it takes longer to heat up and cool down.
Textured Plates and BuildTak
Textured build plates (including BuildTak, G10/FR4 garolite, and PC-coated surfaces) provide a matte surface texture that grips filaments mechanically. BuildTak is a stick-on polymer sheet that works well with PLA and PETG at standard bed temperatures but wears out after 100–200 prints and needs replacement.
G10/FR4 garolite has gained popularity as a durable, low-cost alternative. It delivers excellent adhesion for PLA and ABS, resists heat up to 150°C, and lasts much longer than BuildTak. The trade-off is that prints can be difficult to remove without flexing the substrate.
Proven Bed Adhesion Methods Every Maker Should Know
Even with the right bed surface, some materials and geometries need extra help. These adhesion aids are the most reliable solutions in the 3D printing community.
| Method | Best For | Pros | Cons |
|---|---|---|---|
| Glue Stick | PLA, PETG on glass or smooth PEI | Cheap, easy to apply, water-soluble cleanup | Needs reapplication every 3–5 prints, can leave residue |
| Hairspray | PLA, ABS on glass | Quick, even coating, good release when cool | Overspray contaminates printer frame and electronics |
| Blue Painter’s Tape | PLA on bare glass or aluminum beds | Zero cleanup, cheap, replaceable | Tape lines imprint on bottom surface, not reusable |
| ABS Slurry | ABS, ASA on glass | ABS dissolves in acetone and bonds chemically with the print | Strong fumes, messy application, requires ventilation |
| Magigoo / 3DLac | All filaments including PC and Nylon | Formulated for specific materials, predictable release | More expensive per application than DIY methods |
For most PLA and PETG users, a simple glue stick applied to a clean PEI or glass bed is the lowest-effort path to reliable adhesion. You can also explore the DIY3D model library for print-ready models with community-suggested settings that include adhesion recommendations for each surface type.
Optimal Bed Temperatures for Every Filament Type
Bed temperature directly controls how fast the first layer cools and shrinks. Too cold, and the plastic contracts immediately, pulling away from the bed. Too hot, and the material stays molten too long, causing elephant-footing or surface defects on the bottom layer.
PLA – 50–65°C
PLA is the most forgiving material for bed adhesion. It prints reliably on PEI at 55°C, on glass at 60–65°C, and on BuildTak or textured plates at 50–60°C. No enclosure is needed, and the risk of warping is low unless the part has very sharp corners or a large flat base.
PETG – 65–80°C
PETG bonds aggressively to bed surfaces, especially smooth PEI and glass. A bed temperature of 70–75°C works for most brands, but PETG can stick so well that it pulls chunks out of PEI or glass upon removal. Use a glue stick or dedicated release agent on smooth surfaces even though the glue seems counterintuitive for adhesion.
ABS and ASA – 90–110°C
ABS and ASA require high bed temperatures and a draft-free enclosure to prevent warping. The material shrinks significantly as it cools, creating internal stresses that lift the corners off the bed. Without an enclosure maintaining a stable chamber temperature of 40–50°C, even perfect bed adhesion fails once the print reaches a certain height.
TPU and Nylon – The Tricky Materials
Flexible TPU adheres well to textured PEI at 40–60°C but can be difficult to remove because it conforms to surface texture. A glue stick layer acts as a release agent. Nylon requires bed temperatures of 70–90°C and a clean BuildTak or garolite surface, with an enclosure strongly recommended to manage shrinkage.
Research finding: A 2023 study published in Additive Manufacturing found that bed temperatures above the filament glass transition temperature (Tg) during the first layer improve interlayer bonding strength by up to 35% compared to printing on a cold bed, but must be maintained until the part is at least 5 mm tall to prevent stress-induced warping.

How to Troubleshoot 3D Print Bed Adhesion Problems
When a print fails to stick, the cause is almost always one of these four root problems. Diagnosing which one saves hours of trial and error.
Dirty Bed Surface – The #1 Cause
Oil from your fingers, dust settling between prints, and plastic residue from previous prints all reduce adhesion. A wipedown with 90%+ isopropyl alcohol and a lint-free cloth between every print is the single highest-impact habit for reliable 3D print bed adhesion. For glass beds, occasional washing with warm water and dish soap removes oils that alcohol alone leaves behind.
Z-Offset Too High (First Layer Not Squished)
If the nozzle is too far from the bed, the filament comes out round instead of flat. The result is thin, translucent lines that don’t bond to the bed or to each other. Lower the Z-offset in small increments (0.02 mm at a time) until the first layer lines are flat and slightly pressed together with no gaps between them.
Z-Offset Too Low (Nozzle Digging In)
When the nozzle is too close, the filament has nowhere to go and builds up around the nozzle, causing scratches, transparent first layers, and eventually a clog. The solution is raising the Z-offset by 0.02–0.05 mm. If you see grooves or ridges being plowed through the first layer, the nozzle is too low.
Warping and Corner Lift-Off
Warping happens when the upper layers of the print cool and contract, pulling the corners of the lower layers upward. This is most common with ABS, ASA, and large PLA flat surfaces. Solutions include adding a brim (3–5 mm wide), increasing bed temperature by 5–10°C, and eliminating drafts from air conditioning or open windows. If you haven’t yet dialed in proper bed leveling as a first step, start there before adjusting other variables.
First Layer Speed Too Fast
Many slicers default to the same speed for the first layer as the rest of the print, but the first layer benefits from being slower. Set first layer speed to 20–25 mm/s for PLA and 15–20 mm/s for materials prone to warping. The extra time allows the filament to bond properly to the bed surface before additional mass is added on top.
Get Your First Layers Perfect Every Time
Stop fighting adhesion issues and start printing. Join thousands of makers sharing tested models with community-vetted settings on DIY3D.
Browse Free 3D Models on DIY3D
⭐ 100% free library • Open to all printers • Community-driven
Common Questions About 3D Print Bed Adhesion
Why won’t my 3D print stick to the bed?
The most common cause is a dirty bed surface. Wipe the bed with 90%+ isopropyl alcohol between every print. If the problem persists, check your Z-offset and confirm the bed temperature matches your filament type. An unlevel bed also prevents consistent first-layer contact across the entire build area.
What is the best bed surface for 3D printing?
PEI spring steel sheets are the best all-around choice for most users. They provide reliable adhesion for PLA, PETG, and TPU at standard bed temperatures and release prints cleanly once cooled. For PETG, use a glue stick layer on smooth PEI to prevent over-bonding.
Does glue stick help with bed adhesion?
Yes. Glue stick creates a thin, tacky layer that helps PLA and PETG grip the bed during printing and acts as a release agent once the bed cools. It is especially useful on glass and smooth PEI surfaces. A standard purple disappearing glue stick applied in a thin even layer lasts 3–5 prints.
What temperature should the bed be for PLA?
PLA sticks best at a bed temperature of 50–65°C. On PEI sheets, 55°C is sufficient. On glass beds, use 60–65°C because glass transfers heat less efficiently. No enclosure is needed for PLA, but avoid drafts that cause uneven cooling.
Why is my 3D print lifting off the bed mid-print?
Lifting or warping happens when internal stresses from cooling overcome the bed adhesion. Common fixes include adding a 5 mm brim in the slicer, increasing the bed temperature by 5–10°C, lowering the first layer speed to 20 mm/s, and eliminating drafts from AC vents or open windows.
How do I fix PETG sticking too well to the bed?
PETG has a tendency to bond aggressively to smooth surfaces. Apply a thin layer of glue stick or use a dedicated release agent like Magigoo before printing. Textured PEI sheets also reduce PETG over-bonding. Allow the bed to cool completely to room temperature before attempting removal.
Conclusion: Get Better Adhesion and Start Printing on DIY3D
Mastering 3D print bed adhesion comes down to three controllable factors: a clean bed surface, the correct bed temperature for your filament, and a properly calibrated Z-offset. With a PEI sheet at 55°C for PLA, a quick alcohol wipe between prints, and a brim for large flat parts, you can eliminate the vast majority of first-layer failures.
Every material and printer combination behaves slightly differently, so keeping a print log of your successful bed temperature and surface combinations helps you replicate good results. The DIY3D community shares model-specific print settings including bed temperature, surface type, and adhesion methods for thousands of free 3MF files with embedded profiles.
Ready to put your perfectly tuned bed adhesion to use? Explore free print-ready models at DIY3D and join a community of makers who share tested settings for every filament and printer combination.
Start Printing Today on DIY3D
Download free 3MF and STL files with community-vetted print settings. No paywalls. No brand lock-in. Just great models that print right the first time.
⭐ 7,000+ models • 3MF with print settings • Free for everyone
