
Quick Summary
- 3D printer bed leveling aligns the build plate parallel to the nozzle’s X/Y movement path, creating a consistent 0.1 to 0.2 mm first-layer gap that determines print adhesion and surface finish quality.
- Manual leveling with the standard printer-paper method costs nothing and works on any FDM machine, but achieving uniform drag feel across all four bed corners requires methodical practice.
- Automatic bed leveling systems using inductive probes, BLTouch sensors, or load cells compensate for minor surface irregularities up to roughly 2 mm but still depend on a mechanically trammed bed as the starting baseline.
- An estimated 90% of first-layer print failures including poor adhesion, elephant foot, corner warping, and nozzle scraping trace back to incorrect or inconsistent bed leveling according to community surveys.
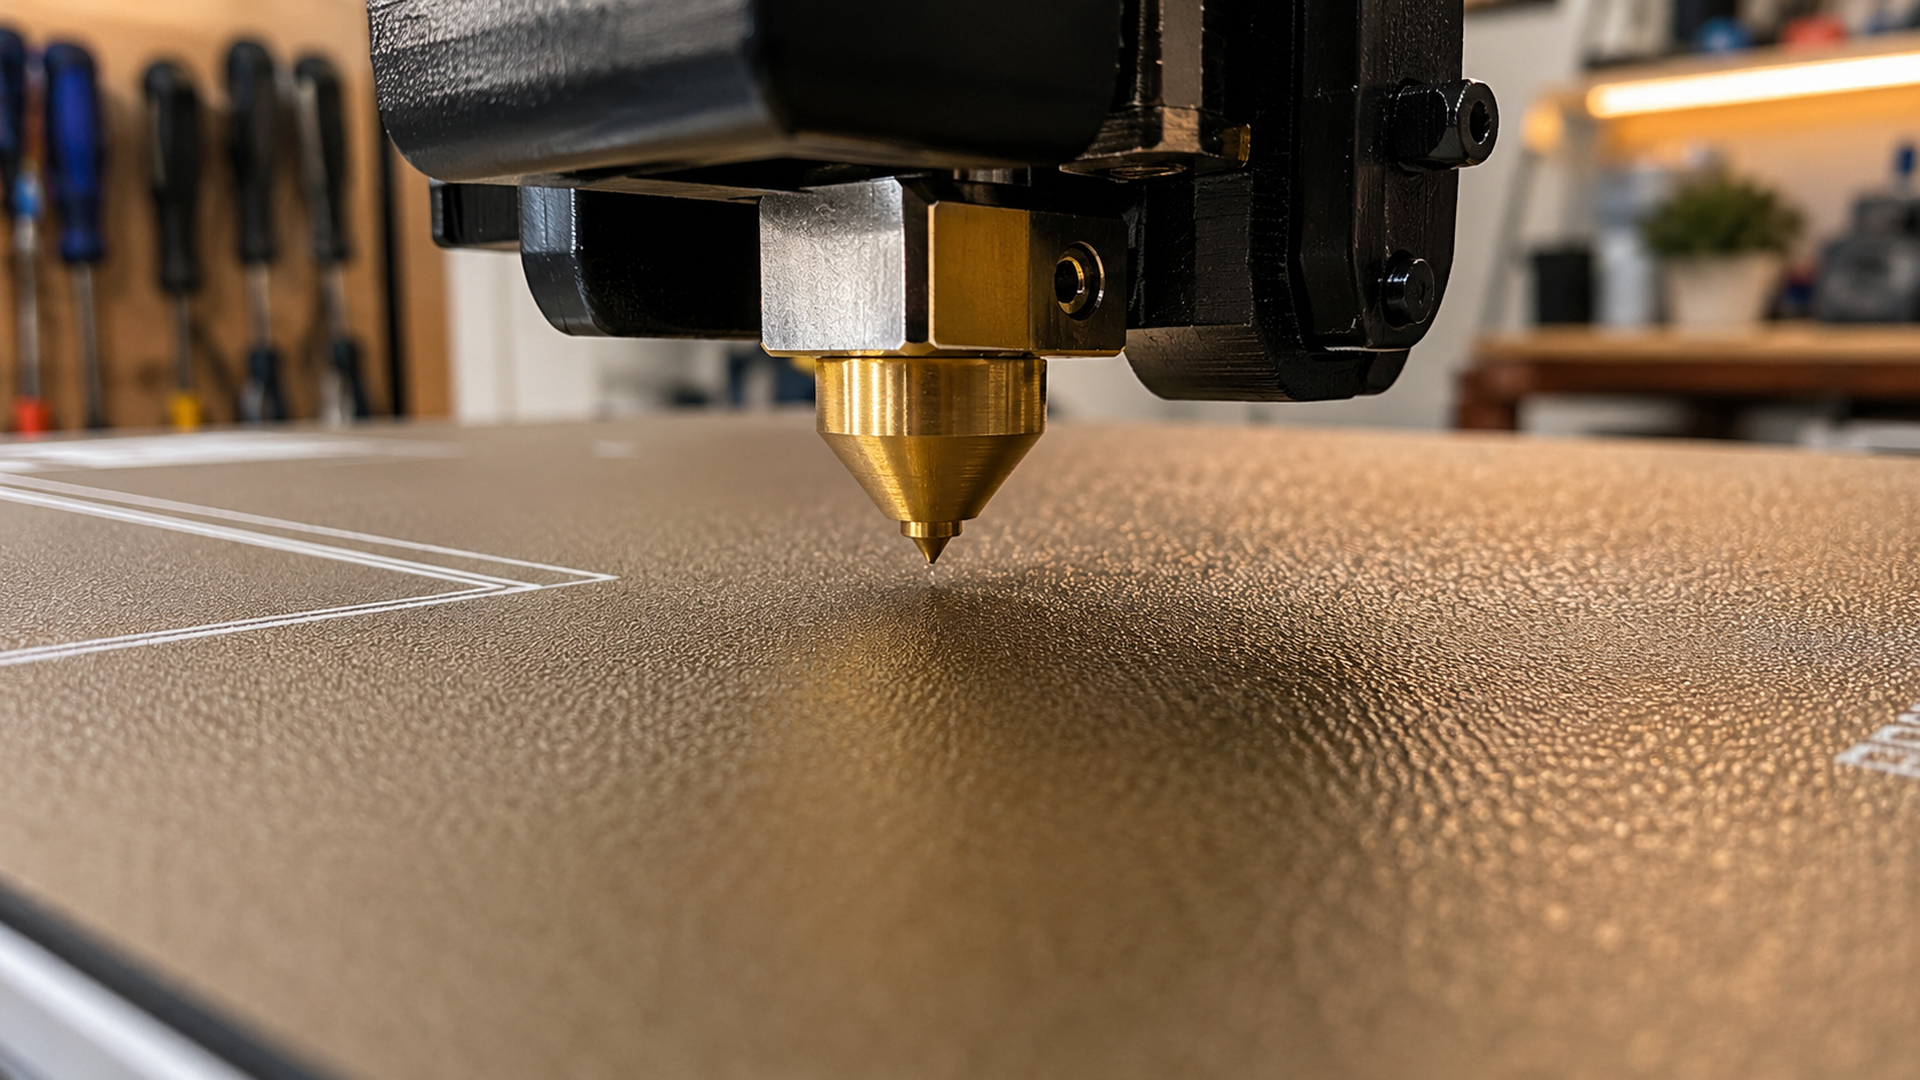
3D printer bed leveling is the process of tramming the build plate so it sits exactly parallel to the nozzle’s X/Y gantry movement, producing a uniform first-layer gap across the entire print surface. Every FDM print depends on this gap being accurate to within roughly 0.05 mm. Too wide and the filament won’t stick; too narrow and the nozzle drags through the first layer and ruins the print.
- Why Bed Leveling Makes or Breaks Your Prints
- Manual Bed Leveling: Paper Method Step by Step
- Automatic Bed Leveling and How It Works
- Common Bed Leveling Problems You Can Fix
- Best Bed Leveling Practices for Reliable First Layers
- Common Questions About 3D Printer Bed Leveling
- Find Print-Ready Models on DIY3D
Why Bed Leveling Makes or Breaks Your Prints
The first layer is the structural foundation of every FDM print. If the nozzle-to-bed gap varies by even 0.1 mm across the build plate, you get inconsistent extrusion. Sections where the filament squishes flat and sticks well sit next to sections where it peels up within the first five layers.
Proper bed leveling solves this by making the build plate surface parallel to the toolhead’s travel plane. When the bed is properly trammed, every point on the surface receives the same gap distance, and the extruded filament is pressed down at consistent force across the entire first layer.
① First layer adhesion drives print success rates. A 2024 community survey by All3DP across 3,200 FDM printer owners found that bed leveling issues were the single most reported cause of failed prints, cited by 67% of respondents. Getting the bed level right eliminates the majority of everyday print failures before they start.
Manual Bed Leveling: Paper Method Step by Step
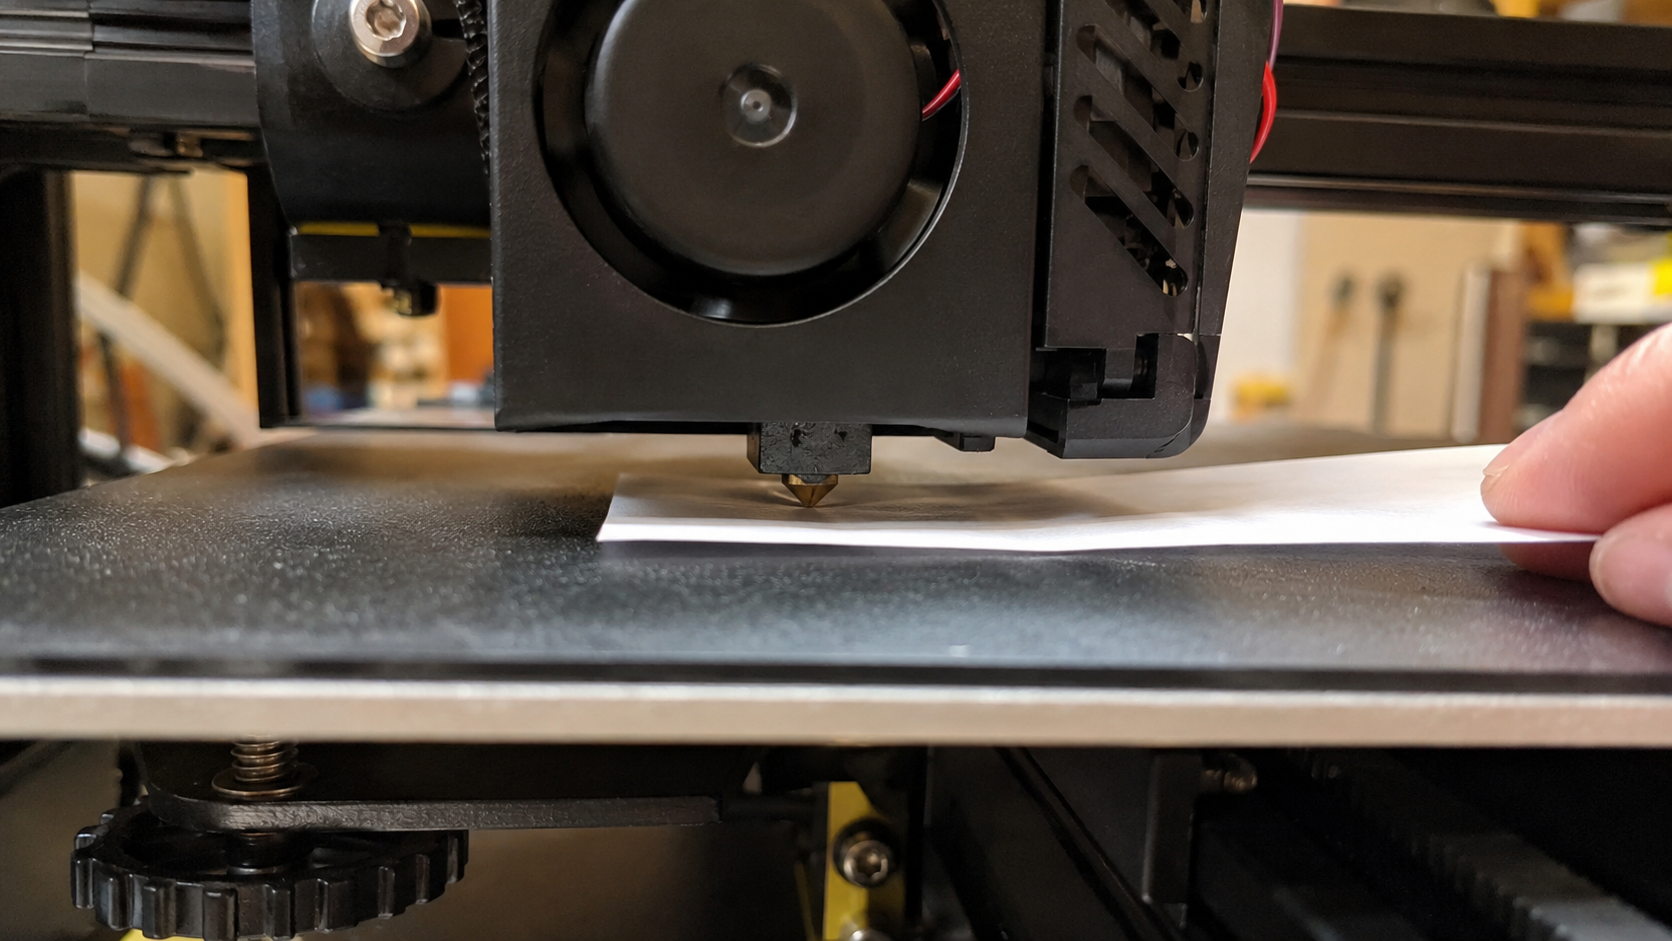
Manual bed leveling (sometimes called tramming) uses adjustment knobs under the build plate to raise or lower each corner independently. The paper method is the most widely taught technique because it requires zero tools and works on every FDM printer.
What You Will Need
- A standard sheet of printer paper (80 gsm, roughly 0.1 mm thick)
- The hex key that came with your printer (for knob-less systems)
- Your printer’s built-in control screen or tuning menu
Step-by-Step Procedure
Automatic Bed Leveling and How It Works
Most modern printers ship with some form of automatic bed leveling (ABL), but the term is misleading. ABL systems do not physically tram the bed. Instead they measure the bed surface at multiple points and build a height map the firmware uses to compensate for irregularities during printing.
Types of ABL Probes
| Probe Type | How It Works | Found In | Accuracy |
|---|---|---|---|
| Inductive probe | Senses metal build plate via electromagnetic field; non-contact | Creality CR Touch, Ender 3 series | ±0.05 mm |
| BLTouch / 3D Touch | Retractable metal pin touches the bed surface; works with glass or PEI | Upgraded Ender, Prusa, aftermarket | ±0.02 mm |
| Load cell / strain gauge | Measures nozzle contact pressure; no separate probe | Bambu Lab X1C, P1S, Prusa MK4 | ±0.01 mm |
| Force sensor (nozzle) | Nozzle touches bed, sensor detects contact force | Bambu Lab A1 | ±0.005 mm |
Why Manual Tramming Is Still Required
An ABL system generates a mesh of up to 25 by 25 points and tilts the G-code Z-height to follow the measured surface. But the mesh has a maximum correction range of typically 2 to 5 mm depending on the firmware. If the bed is tilted beyond that range, the ABL system cannot compensate.
The correct workflow is: tram the bed manually first (four corners, paper method), then run the ABL calibration. The mesh handles minor surface waviness such as a warped build plate or uneven PEI sheet. It is not designed to fix a grossly tilted bed.
💡 Pro Tip: On printers with assisted bed leveling (Bambu Lab’s “Manual Leveling” wizard, Prusa’s “Calibrate XYZ” with nylock mod), the procedure still starts with the paper method. The printer moves the nozzle to each corner for you, but you still turn the knobs by hand.
Common Bed Leveling Problems You Can Fix
The key to fixing bed leveling issues is recognizing what the first layer is telling you and knowing which adjustment to make.
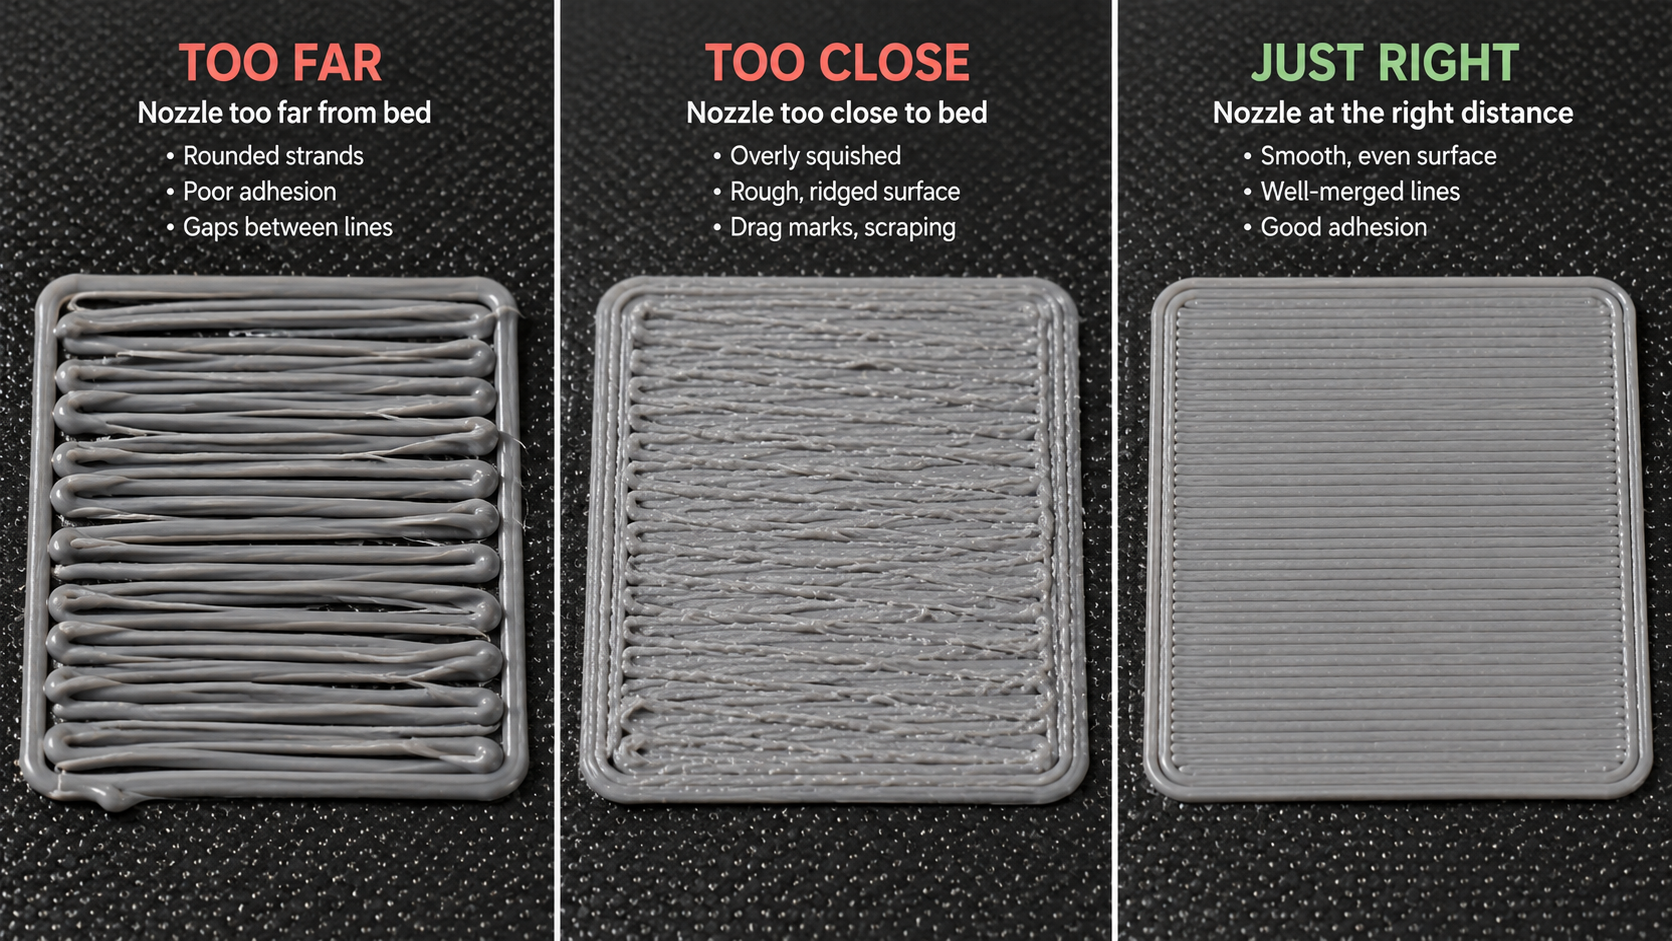
| First Layer Appearance | Root Cause | What to Do |
|---|---|---|
| Filament forms round, loose strands that do not merge | Nozzle too far from the bed (gap too large) | Lower the corner by 1/8 turn, or decrease Z-offset by 0.05 mm |
| Surface is rough, ridged, or has scalloped edges | Nozzle too close (gap too small, material has no room to escape) | Raise the corner by 1/8 turn, or increase Z-offset by 0.05 mm |
| First layer sticks on one side but peels on the opposite side | Bed is tilted relative to gantry | Re-run manual leveling on all four corners from step 1 |
Additional Issues and Fixes
Bed level keeps drifting between prints. Stock springs on many printers are too soft and lose tension with heat cycles. Replace them with silicone spacers or stiffer yellow springs. This reduces leveling frequency from every print to once every 15 to 20 prints.
Z-offset changes after each print. The Z-endstop switch is loose or the endstop mount has shifted. Tighten the bracket and re-run Z-offset calibration. On probe-based printers, verify the probe mount is tight.
Best Bed Leveling Practices for Reliable First Layers
📝 Level at printing temperature, always. A heated bed expands measurably. Leveling cold and printing at 60°C guarantees the gap changes. The 5 minutes spent heating are faster than redoing a failed first layer.
🧹 Clean the bed between every print. Finger oils create invisible patches where adhesion drops sharply. A quick wipe with 70%+ isopropyl alcohol takes 10 seconds and eliminates false-positive leveling tests.
🏐 Run a bed mesh visualization if your firmware supports it. Marlin, Klipper, and Bambu Lab firmware support some form of bed mesh display. Spots within ±0.1 mm are fine. Spots outside ±0.2 mm need mechanical adjustment.
⚙️ Upgrade to silicone spacers or solid bed mounts. Stock springs on printers under $500 are the weakest link. Silicone spacers (roughly $8 for a set of four) provide consistent compression and reduce drift for months.
Start Printing With Perfect First Layers
Thousands of free, print-ready models with community-verified settings on DIY3D
No account required to browse and download
Common Questions About 3D Printer Bed Leveling
Find Print-Ready Models on DIY3D
3D printer bed leveling is a skill that improves with practice and the right tools. Heat the bed, use consistent paper drag, check all four corners twice, and run a first-layer test before every critical print. Printers with ABL still need manual tramming as a foundation.
Once your bed is dialed in, use models with tested print profiles. The free 3D printer model library on DIY3D includes community-uploaded designs with embedded build plate settings, printer profiles, and verified print configurations. Every model is available for immediate download with no paywall and no account required.
For more printing guides, visit the DIY3D blog for printing guides.
Download Free 3D Printer Models
Join the DIY3D community and find your next print-ready project today
Free to download • No account required • Open to all printers
