

Quick Summary
- Bed adhesion problems cause roughly 40% of all first-time print failures, making proper leveling and surface preparation the most critical steps for reliable 3D printing.
- Stringing and oozing are resolved by tuning retraction distance (1-2 mm for direct drive, 4-7 mm for Bowden), lowering nozzle temperature by 5-10°C, and drying hygroscopic filaments like PETG and TPU.
- Warping is caused by thermal stress during cooling and is best prevented with a heated bed, enclosure, brim/raft, and infill patterns like gyroid that reduce internal stress.
- Under-extrusion and over-extrusion both trace back to flow calibration: calibrate extruder e-steps, then tune the flow multiplier using a single-wall cube test for your specific filament.
- Layer shifting is almost always a mechanical issue priority-check belts, grub screws on motor pulleys, and axis binding before adjusting slicer acceleration or jerk values.
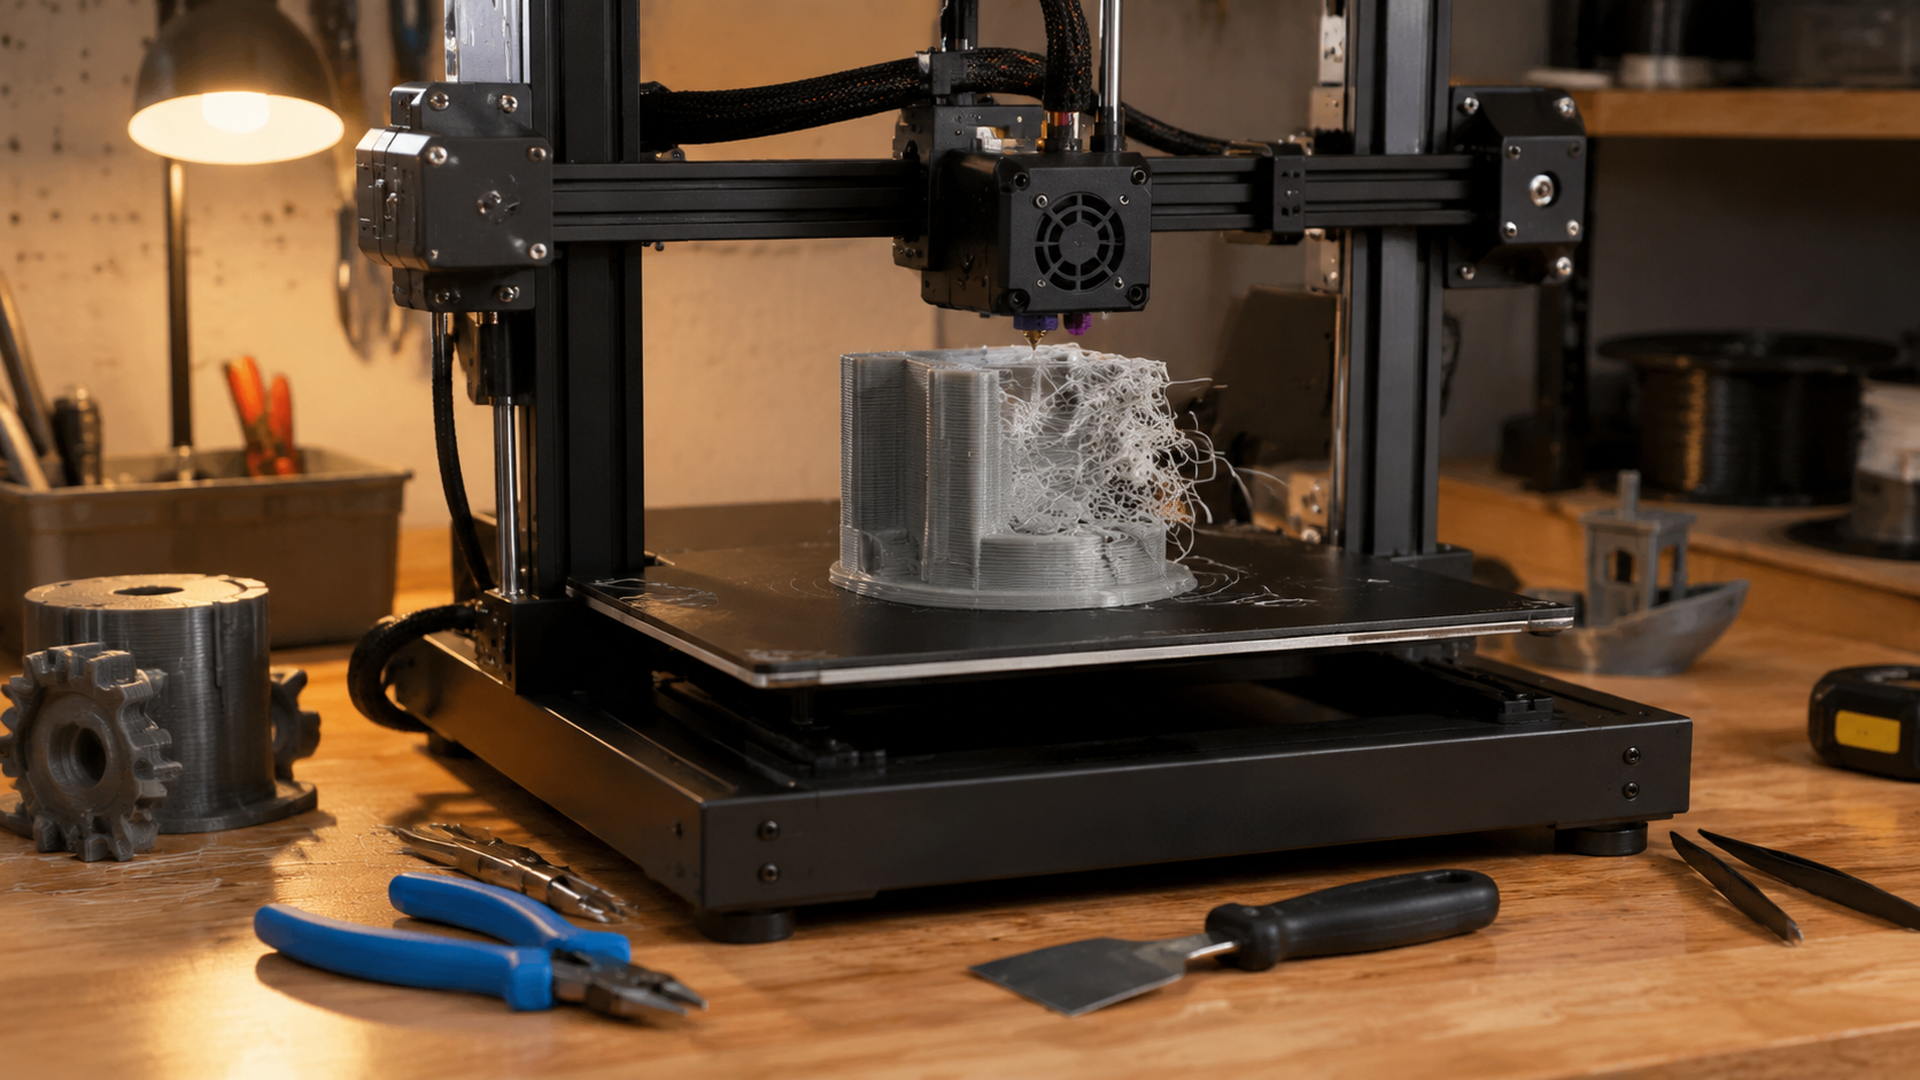
3D printing troubleshooting means diagnosing and fixing print quality problems across every stage of the FDM workflow from first-layer adhesion and filament extrusion to mechanical alignment and cooling. Most common issues fall into six categories bed adhesion, stringing, warping, extrusion errors, layer shifting, and surface finish defects each with known root causes and repeatable fixes that work across printer brands and slicers.
- Why Your Prints Won’t Stick: Bed Adhesion Problems Solved
- Stringing and Oozing: How to Eliminate Unwanted Filament Strings
- Warping and Curling: Stop Your Prints from Lifting Off the Bed
- Under-Extrusion and Over-Extrusion: Getting Flow Rates Right
- Layer Shifting and Misaligned Prints: Fixing Mechanical Issues
- Rough Surfaces, Elephant’s Foot, and Poor Overhangs: Fine-Tuning Quality
- Frequently Asked Questions About 3D Printing Troubleshooting
- Get Better Prints: Your Next Steps
Why Your Prints Won’t Stick: Bed Adhesion Problems Solved
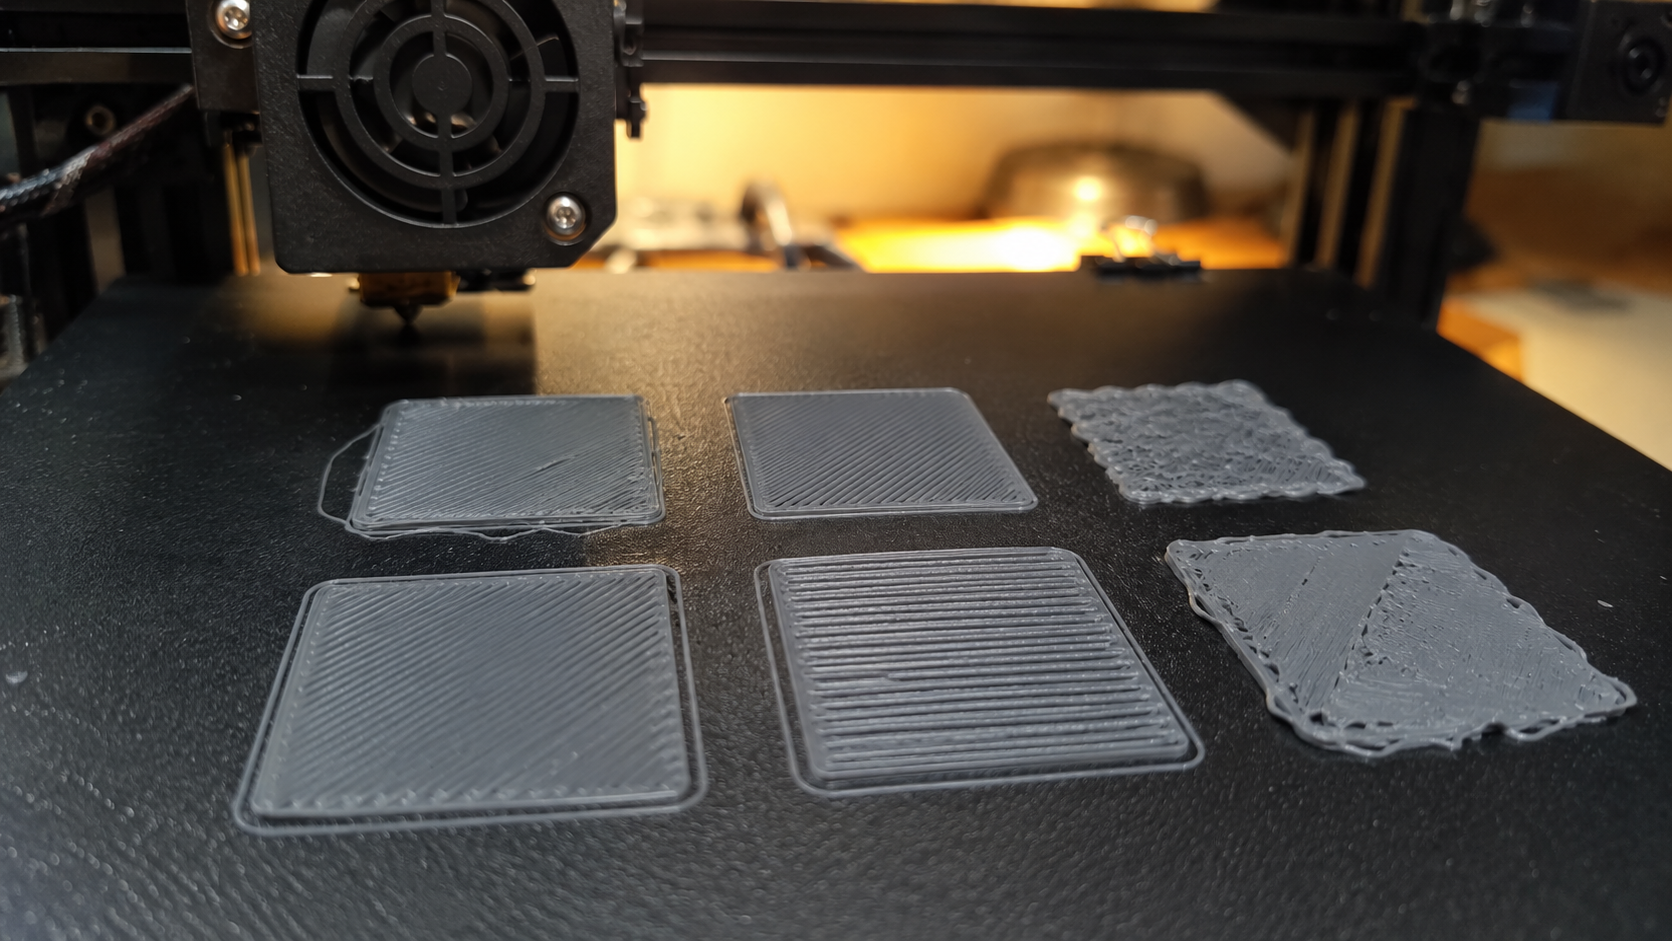
A print that peels off the build plate mid-job is the most common failure in 3D printing troubleshooting. The root cause is almost always one of three things incorrect Z-offset, a contaminated build surface, or insufficient first-layer squish. Start with a fresh bed level using the paper test the nozzle should drag slightly on standard printer paper (roughly 0.08-0.12 mm gap). Then clean the plate with isopropyl alcohol at 70% or higher; even finger oils create localized adhesion failure.
💡 First-Layer Checklist
• Bed leveled with paper drag at all four corners and center
• Surface cleaned with IPA between every print
• First-layer speed set to 20-30 mm/s in slicer
• First-layer temperature 5-10°C above normal print temp
• Brim enabled for models with small contact area
Common causes of poor first-layer adhesion
A bed leveling guide is the first stop for any adhesion issue. Unlevel beds produce inconsistent nozzle pressure across the build area some regions are too close (scraping, no extrusion), others too far (round beads that don’t squish). Beyond leveling, temperature mismatch is the second most common culprit. PLA needs a bed at 50-60°C; PETG at 70-80°C; ABS at 90-110°C. Running too cold reduces polymer chain mobility at the interface, and the print lifts as internal stresses build.
Choosing the right build plate surface and adhesives
PEI sheets are the gold standard for PLA and PETG they provide excellent grip when heated and release naturally after cooling. Textured plates work better for PETG (smooth PEI can over-adhere and damage the sheet). For ABS and nylon, a layer of glue stick or magigoo on a heated glass bed is the most reliable approach. Garolite (G10) is a strong option for nylon and polycarbonate. Avoid painter’s tape for high-temperature materials it degrades above 70°C and causes overnight print failures when the tape shifts.
Stringing and Oozing: How to Eliminate Unwanted Filament Strings
Stringing happens when molten filament leaks from the nozzle during travel moves. The fix chain is retraction first, temperature second, material condition third. This section covers each step so you can eliminate strings regardless of your printer or filament type. For a deep dive on one specific material, see our 3D printer stringing fix guide.
What causes stringing and oozing
Three variables control stringing nozzle pressure (retraction pulls filament back to relieve pressure), material viscosity (hotter filament flows more easily and drips more), and travel path length. Moisture-saturated filaments flash-steam inside the melt zone, bubbling out and carrying filament with them across travel moves. PETG and TPU are noticeably more string-prone than PLA because their higher melt viscosity requires more aggressive retraction to relieve nozzle pressure.
Retraction settings that work for PLA, PETG, and TPU
| Filament | Retraction Distance (Direct Drive) | Retraction Distance (Bowden) | Retraction Speed |
|---|---|---|---|
| PLA | 0.8-1.2 mm | 4-6 mm | 40-50 mm/s |
| PETG | 1.0-1.5 mm | 5-7 mm | 30-40 mm/s |
| TPU | 0.5-1.0 mm | N/A (Bowden not recommended) | 20-30 mm/s |
| ABS | 0.8-1.2 mm | 4-5 mm | 40-60 mm/s |
Temperature and travel speed adjustments
Run a temperature tower for every new spool of filament. Drop the temperature in 5°C increments from the manufacturer’s max rating. The lowest temperature that still produces strong layer adhesion is your stringing-optimal temp. Enable “avoid crossing walls” or “combing” in your slicer to keep the nozzle within printed boundaries during travel moves. Increase travel speed to 150-200 mm/s to reduce the time the nozzle spends over open space.
Warping and Curling: Stop Your Prints from Lifting Off the Bed
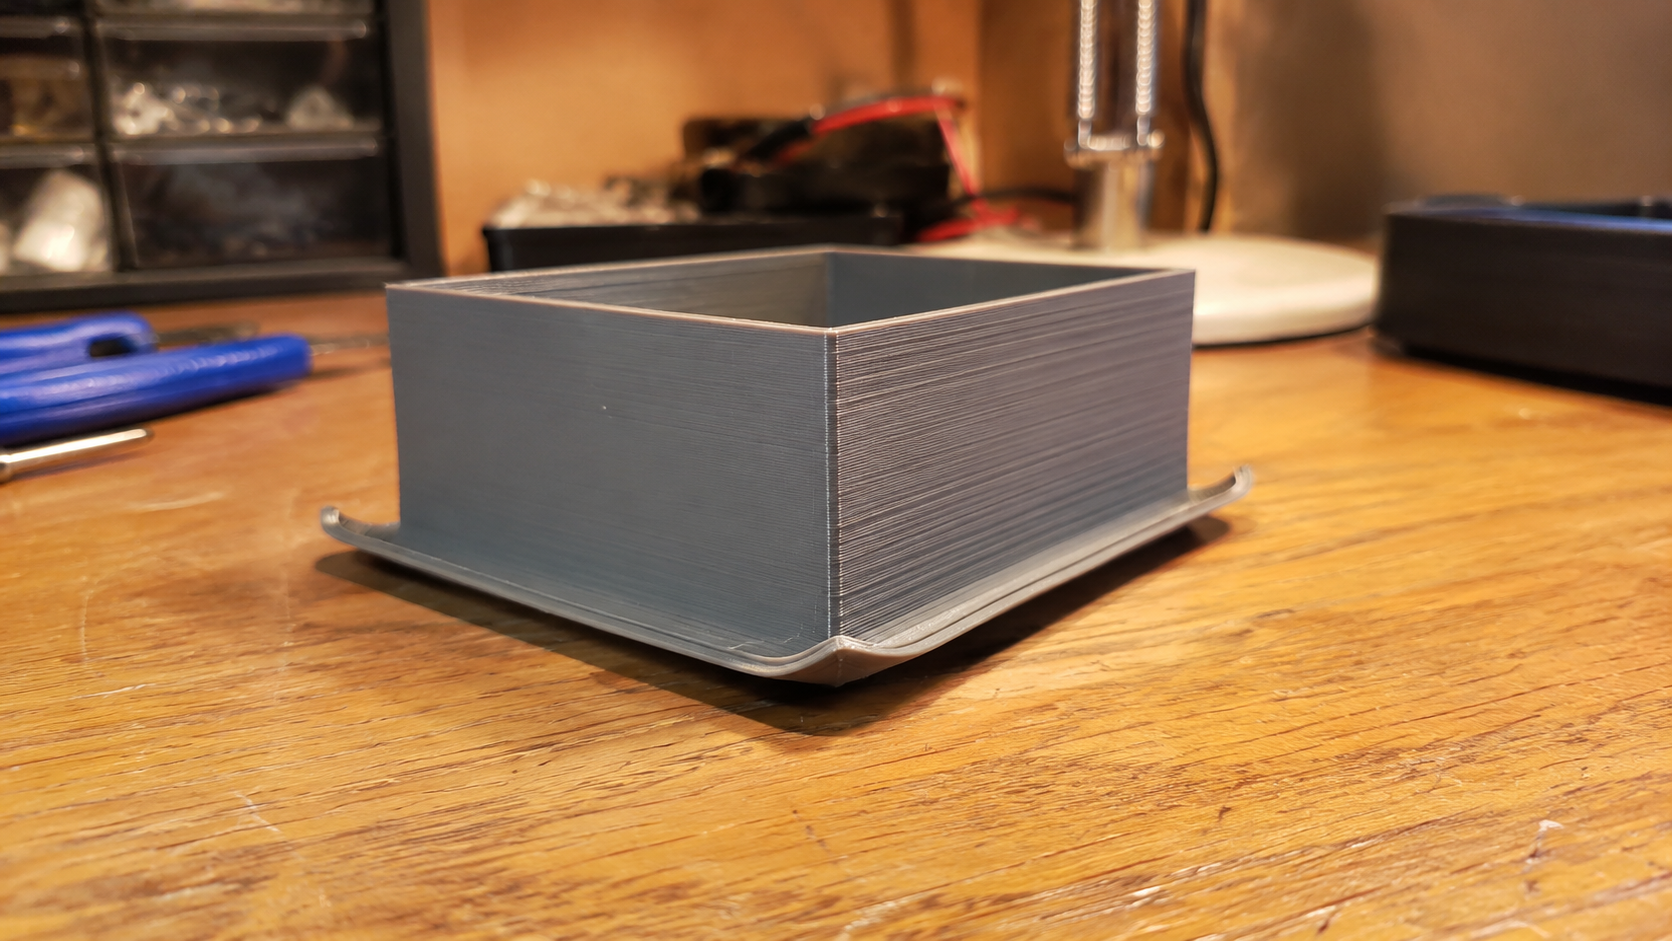
Warping occurs when upper layers of a print cool and shrink, pulling the corners of the bottom layer upward. The effect is strongest with materials that have a high coefficient of thermal expansion especially ABS, nylon, and polycarbonate. PLA resists warping well but can still lift on large flat parts if the bed temperature is uneven or a draft is present.
Why warping happens (thermal stress and material shrinkage)
As each new layer is deposited at roughly 200-260°C (depending on material), it bonds to the layer below and begins cooling. The cooling layer contracts while the layers below remain at their expanded size. This differential stress pulls the edges upward. Materials with higher glass transition temperatures (ABS at ~105°C, nylon at ~70°C) experience more differential stress than low-Tg materials like PLA (~60°C).
Enclosure, brim, and raft strategies
An enclosure is the single best investment for warping-prone materials. A stable ambient temperature of 35-45°C inside the enclosure dramatically reduces the cooling gradient between layers. For open-frame printers, a brim (8-12 mm width) increases the contact surface area and distributes peel forces. Switch infill patterns from grid or rectilinear to gyroid or honeycomb these patterns expand and contract more isotropically, reducing directional stress buildup.
Filament-specific tips for ABS, PETG, and nylon
ABS requires a chamber temperature of 40-50°C; without one, expect corner lift on any part longer than 100 mm. PETG is less warp-prone but benefits from reduced fan speed (30-50% max) to slow the cooling rate. Nylon (especially PA6 and PA12) needs active chamber heating or a very well-insulated enclosure together with a Garolite or PEI bed at 80-100°C. Add a 10 mm brim for all nylon prints as a baseline.
Stop Fighting Your Printer Settings
Download print-ready 3MF files with pre-configured settings for your exact printer and filament.
No account required to browse. All files are free to download.
Under-Extrusion and Over-Extrusion: Getting Flow Rates Right
Inconsistent extrusion is the most frustrating issue because it looks different on every print. Under-extrusion produces gaps between perimeters, weak layer bonding, and translucent top surfaces. Over-extrusion creates blobs, rough sidewalls, and dimensional inaccuracy. Both trace to the same root calibration extruder e-steps and flow multiplier.
📊 The Calibration Baseline
According to All3DP’s 2026 troubleshooting roundup, bed adhesion issues account for nearly 40% of all first-time print failures, making leveling and surface preparation the most critical steps for beginners. Extrusion calibration follows a close second: a 10% flow error translates to roughly 0.08 mm of dimensional deviation on a 0.4 mm nozzle, which accumulates across 100+ layers in a typical model.
Calibrating extruder steps and flow multiplier
Start with e-step calibration: mark 120 mm of filament above the extruder, command 100 mm of extrusion, measure the actual movement. Adjust with M92 E{steps} if the measured value doesn’t match. Then tune flow using a single-wall cube (0.4 mm nozzle, 0.2 mm layer height). Measure the wall thickness with calipers if it reads 0.44 mm, your flow multiplier is 0.44 / 0.40 = 110%. Adjust down accordingly. This two-step process eliminates 90% of extrusion-related defects.
Checking for clogs, partial jams, and filament diameter issues
A partial clog mimics under-extrusion but only e-step calibration reveals the difference. If calculated e-steps are normal but extrusion is still inconsistent, perform a cold pull (also called atomic pull) heat the hotend to printing temperature, insert filament, let it cool to roughly 90°C for PLA, then pull firmly. The tip should show a clean impression of the nozzle interior. Measure filament diameter with calipers across 3-5 points if it deviates more than 0.05 mm from the labeled value, the spool is out of spec and will cause inconsistent extrusion regardless of settings.
Layer Shifting and Misaligned Prints: Fixing Mechanical Issues
A shifted layer is always a mechanical or motion-system problem. Unlike extrusion or adhesion issues, layer shifting cannot be fixed in the slicer alone if there is slack, binding, or overheating in the motion system, the printer will lose position and shift mid-print.
How to tighten belts and lubricate linear rails
X and Y belts should twang like a low guitar note when plucked not slack enough to deflect more than 5 mm when pressed firmly. Most printers have belt tensioners on the X-axis carriage and Y-axis motor mount. For CoreXY printers, belt tension must be equal on both belts unequal tension causes skew, not just shifting. Lubricate linear rods with PTFE or lithium grease every 200 print hours. For linear rails, apply a thin film of synthetic grease and work it in by moving the carriage end to end.
Adjusting jerk and acceleration in your slicer
If the mechanical system is sound but shifting still occurs at high speeds, reduce maximum acceleration. As a baseline: 500 mm/s2 for X and Y on bedslingers, 1000 mm/s2 on CoreXY. Jerk (or junction deviation on Marlin 2.x) controls how sharply the printer can change direction. Lower jerk values produce cleaner corners but increase print time. Start at 8 mm/s for jerk and tune down if corners show ghosting, up if the printer shakes excessively.
Rough Surfaces, Elephant’s Foot, and Poor Overhangs: Fine-Tuning Quality
Surface finish defects are the last frontier of 3D printing troubleshooting once adhesion, extrusion, and mechanics are sound, the remaining quality issues come down to cooling, layer height, and support strategy.
Elephant’s foot: causes and fixes
Elephant’s foot the flared-out bottom layer that makes the first 2-3 mm wider than the rest of the print is caused by the bed temperature softening the lower layers under the weight of the print. Fix it by lowering bed temperature 5°C at a time until the flare disappears, or use the “initial layer horizontal expansion” setting in your slicer at a negative value like -0.2 mm to compensate. Ensure part cooling fan is active from layer 3 onward to solidify the material faster.
Improving overhangs and bridging with cooling and support settings
Overhangs beyond 45 degrees from vertical require either supports or aggressive cooling. Enable the part cooling fan at 100% after the first layer. For bridges (gaps between two points), increase bridging fan speed to 100% and reduce bridging flow to 80-90% to prevent sag. In OrcaSlicer and Bambu Studio, the “support critical angle” setting auto-generates supports only where needed. For complex organic models, tree/organic supports use less material and leave a cleaner surface than standard grid supports.
⚡ Where DIY3D Fits in Your Workflow
Every model on DIY3D is available as a 3MF file with embedded print settings including layer height, infill type, support configuration, and temperature profiles tested by the uploader. Instead of guessing retraction values for an unfamiliar filament, browse community models that match your printer and material the settings are baked into the file. The platform is free, printer-agnostic, and requires no account to browse.
Frequently Asked Questions About 3D Printing Troubleshooting
Why is my print not sticking to the build plate?
Poor bed adhesion is usually caused by incorrect Z-offset, a dirty build surface, or wrong bed temperature. Level the bed so the nozzle drags slightly on paper, clean the plate with isopropyl alcohol at 70% or higher, and confirm the bed temperature matches your filament: 50-60°C for PLA, 70-80°C for PETG, 90-110°C for ABS. Adding a brim in the slicer increases the contact area and helps hold down small parts.
What causes stringing or oozing?
Stringing is caused by molten filament leaking from the nozzle during travel moves. Fix it by increasing retraction distance (0.8-1.5 mm for direct drive, 4-7 mm for Bowden), lowering nozzle temperature by 5-10°C, and drying filaments that have absorbed moisture especially PETG, TPU, and nylon. Enable combing or avoid crossing walls in your slicer to keep the nozzle within printed boundaries.
Why is my print warping or curling at the edges?
Warping happens when upper layers cool and contract faster than lower layers, creating internal stress that pulls corners upward. Use a heated bed, reduce drafts by enclosing the printer, add a brim of 8-12 mm, and switch infill to gyroid pattern which expands and contracts more isotropically than grid or rectilinear. For ABS and nylon, an enclosure at 35-50°C is required for large parts.
How do I fix under-extrusion?
Under-extrusion produces gaps between perimeters and weak layer bonding. Calibrate extruder e-steps by measuring actual filament movement against commanded extrusion. Then tune the flow multiplier using a single-wall cube test aim for a wall thickness matching your nozzle diameter. Check for partial clogs with a cold pull and verify filament diameter stays within 0.05 mm of the labeled value across the spool.
What causes layer shifting?
Layer shifting is caused by mechanical issues: loose belts, slipping grub screws on motor pulleys, binding on linear rods, or stepper motor drivers overheating and skipping steps. Tighten belts so they deflect no more than 5 mm when pressed, check grub screws on both motor pulleys, lubricate linear rods every 200 hours, and reduce acceleration to 500 mm/s2 on bedslingers or 1000 mm/s2 on CoreXY as a baseline.
Why do my prints have rough or uneven surfaces?
Rough surfaces can be caused by over-extrusion, vibration, insufficient cooling, or too-large layer height. Calibrate flow rate, check that the printer is on a stable surface, increase fan speed to 100% after the first layer, and use smaller layer heights (0.12-0.16 mm) for visible outer surfaces. Enable ironing in your slicer for a smooth top layer finish on flat surfaces.
Get Better Prints: Your Next Steps
Effective 3D printing troubleshooting follows a logical progression: rule out bed adhesion, confirm extrusion calibration, verify mechanical alignment, then fine-tune cooling and surface settings. Every print failure gives you diagnostic data inspect the failure surface, check the layer at which it failed, and note the material and temperature. Over time you build a personal reference that no generic guide can replace.
For deeper dives into specific issues, our bed adhesion guide covers surface prep and Z-offset calibration in detail, and the bed leveling guide walks through the paper-test method for any printer model.
Print Smarter, Not Harder
Join a community of makers sharing tested models with embedded print settings for every printer and filament.
Browse Community Designs on DIY3D
Free to browse, free to download. No paywalls, no account required.
